
20250103: this is outdated
How To Enter Data for a Single Record
Documentation: Catalog Record
Navigation: Tools Directory > Data Entry -> Enter Records
Select a Data Entry Form
Begin with Previous Records
You can start with the last record you entered or if you have sufficient access, with any previously entered record.
Choose a Collection
Use this option to start from scratch, or from the values stored in a Profile. Select the collection for which you wish to enter data and you will start with your last data entry customization.
After choosing one of these options, you will be directed to the appropriate data entry form.
 Caution
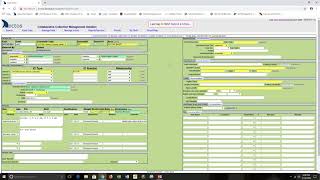
The background of your new data entry screen should be green. If it is not, Arctos will not let you save your data.
Pick a Profile
Profiles are customized data entry forms that may carry seed data. You - or any other user - may use any profile to begin data entry with the data and arrangement in the profile. To see existing profiles or create a new profile, select the Customize button at the bottom of the data entry screen.
Once at the customization screen, you can select an existing profile with the Profiles Home button.
The Profile you are currently using will appear at the top of the list. You may create any number of Profiles, use Profiles created by others, and others may use Profiles created by you.
Profiles serve several functions:
- control the number of some items (such as Attributes) on entry pages
- hide some individual fields
- control the post-save behavior by carrying or clearing values entered in the previous record
- carry “seed” data, defaulted in when the entry form first loads
Caution
Note that a Profile’s seed data will NOT be loaded when a seed record is used. The Profile’s customization will still be used. Also, data values saved in a Profile will have a distinct style and should be carefully checked before saving a record.
How To Customize Data Entry and Create Profiles
See How To Customize the Data Entry Form
Data Entry Form Details
The following provides some specifics by data entry section.
Catalog Record Data
This block includes data about the entire catalog record.
REQUIRED
-
accn is the acquisition number that is given to a set of objects, e.g., 01.2014 and can be selected using the pick button. The accession does not need to be associated with the same collection as the item being entered.
-
guid_prefix will be completed based upon the collection selected above or what has been added to a Profile if one is selected and includes this information.
-
record_type can be left blank if you wish to use the default type selected in collection metadata
OPTIONAL
-
cat_num can be left blank if you wish Arctos to assign the next available number (only for collections using integer catalog numbers).
-
flags can be used to add a notification to the record that some data needs attention after the record is entered. Values are selected from a code table.
-
record_remark is a free text field where anything related to the catalog record that does not fit in the other fields can be documented.
Identifiers
This block includes any identifiers other than the catalog number that are applied to the objects or observations being cataloged or that are applied to objects or observations related to the object or observation being cataloged. You can add 5 identifiers to any catalog record in data entry. Additional identifiers can be added manually or via the Identifier: Bulkload Tool.
 Caution
Any information entered will be ignored unless identifier_type is completed.
CONDITIONALLY REQUIRED (if any other identifier information is entered)
- identifier_type is selected from a code table
OPTIONAL
-
identifier_issued_by can be left blank, but should be completed with the preferred name of the Arctos Agent that issued the identifier if known. If the Agent does not exist, leave blank and place the information in identifer_remark.
-
identifier_value is the COMPLETE identifer. When the identifier is a webpage, DOI, or some other resolvable identifier enter the full url.
 Pro Tip
Arctos includes a helpful tool to help build complete urls for a host of known identifiers. If all you have is the identifier, but you believe it may be part of a url, use the build button at the far right of the identifier row to make use of the tool.
-
identifier_relationship documents how the identifier_value is related to the catalog record being entered. Default is self (the identifier is applied to the object or observation being cataloged). Values are selected from a code table.
-
identifier_remark is a free-text field that allows you to make comments about the identifier.
Pro Tip
Has the data for the record already been entered as part of another record? You can enter the identifier_issued_by, identifier_type and identifier_value and use the pull button on the same row to fill in the current record with data from that record.
Identification
This block includes data about what identifications are applied to the catalog record. You can add 2 identifiations to any catalog record in data entry. Additional identifications will need to be added manually or via the Identification Bulkload Tool.
CONDITIONALLY REQUIRED (if an identification_n is supplied)
- identification_n_order indicates the “acceptedness” of the identification. “0” = unaccepted, “1” = most accepted, “2”-“10” = accepted, but less so than anything with order = “1”.
OPTIONAL
-
identification_n is the identification to be applied to the cataloged item. Type in all or part of the cataloged item’s identification and use the Tab key to select a taxon name, or use the build button to create a complex identification.
-
identification_n_date is the date the identification was assigned. If this is not known, leave it blank.
-
identification_n_remark can be used to add information about the identification, including a verbatim determiner(s) if the Identifying Agent(s) are not found in Arctos Agents.
-
identification_n_agent_n is the Arctos Agent that determined the identification. Type in all or part of the Agent’s name and use the Tab key to select an Agent. Up to 3 determiners can be added in data entry. Additional determiners will need to be added manually.
Identification Attributes
Every identification can include up to 3 attributes in data entry, additional identification attributes can be added manually.
CONDITIONALLY REQUIRED (if any other identification attribute information is entered)
-
Attribute is selected from a code table.
-
Value may be selected from a code table, be a number, or accept free text depending upon the attribute selected.
OPTIONAL
-
Units are CONDITIONALLY REQUIRED by some attribute types, otherwise should be left blank.
-
Date is the date the attribute was determined.
-
Determiner is the Arctos Agent that determined the attribute value. Type in all or part of the Agent’s name and use the Tab key to select an Agent.
-
Method is a free-text description of how the determination was made.
-
Remark can be used to add information about the identification attribute, including verbatim determiner(s) if the determining Agent(s) are not found in Arctos Agents.
Agents
This block includes data about people or organizations that performed one of the agent roles with regard to the catalog record. You can add 8 Agents to any catalog record in data entry. Additional Agents can be added manually or via the Agent Role: Bulkload Tool.
CONDITIONALLY REQUIRED (both agent_n_role and agent_n_name must be completed or the information will be ignored)
-
agent_n_role is selected from a code table.
-
agent_n_name is the Arctos Agent that performed the selected role. Type in all or part of the Agent’s name and use the Tab key to select an Agent.
Pro Tip
Use the CopyAcross button next to any Agent to add the name to all other agent fields in the form.
Place and Time
This block consists of three sections: Record Event, Event, and Locality.
Caution
NONE of the information entered in these sections will save if record_event_type is blank.
Record-Event
This block includes data about why the Event has been associated with the cataloged objects or observations. The information here indicates curation and the activities are related to documenting who and why an Event is associated with the cataloged objects or observations. You can add 1 Record-Event to any catalog record in data entry. Additional Record-Events can be added manually or via the Catalog Record Event: Bulkload Tool.
CONDITIONALLY REQUIRED (if ANY portion of the Time and Place section includes information)
- record_event_type is a description of what happened at the Event and is controlled by a code table
OPTIONAL
-
record_event_determiner is the Arctos Agent who assigned the Event to the catalog record. Type in all or part of the Agent’s name and use the Tab key to select an Agent.
-
record_event_determined_date is the date it was determined that the Event should be associated with this catalog record..
-
record_event_verificationstatus will always be unverified on initial data entry.
-
record_event_verified_by is the Arctos Agent who completed the verification_status. Type in all or part of the Agent’s name and use the Tab key to select an Agent.
-
record_event_verified_date is the date the verification_status was assigned.
-
record_event_collecting_source indicates the captive status of the cataloged objects or observations at the time of the Event and is controlled by a code table.
-
record_event_collecting_method is a free-text field that can be used to add information about methods applied at the Event that are specific to the cataloged objects or observations.
Pro Tip
If methods apply to more than one cataloged object or observation at the same event, use the event method Event attribute as it will be applied to all catalog records associated with the event and will not require repeated entry of the method in individual catalog records.
-
record_event_habitat is a free-text field that can be used to add information about habitat at the Event that are specific to the cataloged objects or observations.
-
record_event_remark is a free-text field that can be used to add any additional information at the Event that is specific to the cataloged objects or observations.
-
associated_species is a free-text field that can be used to add information about other species present at the Event id such information is not present in associated catalog records or in secondary identifications on the same catalog record.
Event
This block includes standardized time and verbatim time and location data. You can add 1 Event to any catalog record in data entry. Additional Events can be added manually or via the Catalog Record Event: Bulkload Tool.
CONDITIONALLY REQUIRED (if you add any Event or Locality data)
-
event_verbatim_locality is the location of the event exactly as described in the field notes or wherever the information is being transcribed from. This field should be as descriptive as possible and include all aspects of “place” provided in the original data.
-
event_verbatim_date is the day plus time of the event as recorded. This field should be as descriptive as possible and include all aspects of “time” provided in the original data.
-
event_began_date is the standardized (See Dates Documentation) date and time that the event began. If no date is known, leave this blank.
-
event_ended_date is the standardized (See Dates Documentation) date and time that the event ended. If no date is known, leave this blank.
OPTIONAL
- event_name Events can be created in advance, given names, and used to eliminate the need for entering the same data into multiple catalog records.
Caution
Entering an existng Event name here will ignore any data that you enter in any of the remaning Event or Locality fields.
Pro Tip
Use the pull/sync button to view the data that is included in the Event. If you find that you have chosen the wrong Event name, then you can use the clear all event button to remove any Event and Locality data and start over.
-
event_id is the ID assigned by Artos to previously entered Events. Use the pick event button to search for events if you believe there is an existing Event you could use.
-
event_remark is a free-text field that allows you to record information about the event that does not fit elsewhere. Make sure that any data that could fit into an Event Attribute is placed there instead of in this catch-all field.
Event Attributes
Every Event can include up to 6 attributes in data entry, additional Event attributes can be added manually or as part of an Event Bulklaod.
CONDITIONALLY REQUIRED (if any other Event attribute information is entered)
-
Attribute is selected from a code table.
-
Value may be selected from a code table, be a number, or accept free text depending upon the attribute selected.
OPTIONAL
-
Units are CONDITIONALLY REQUIRED by some attribute types, otherwise should be left blank.
-
Date is the date the attribute was determined.
-
Determiner is the Arctos Agent that determined the attribute value. Type in all or part of the Agent’s name and use the Tab key to select an Agent.
-
Method is a free-text description of how the determination was made.
-
Remark can be used to add information about the identification attribute, including verbatim determiner(s) if the determining Agent(s) are not found in Arctos Agents.
Locality
This block includes standardized location data. You can add 1 Locality to any catalog record in data entry. Additional Localities can be added manually or via the Catalog Record Event: Bulkload Tool.
CONDITIONALLY REQUIRED (if you add any Locality data)
- locality_higher_geog includes standardized geography selected from a code table.
Pro Tip
If the geography you have is not in the code table, you can use no specific higher geography or if you have no information on geography use no higher geography recorded. See also Higher Geography Documentation
- locality_specific should hold all the location information that would allow someone to find the place on a map or by verbal directions. This value should exclude anything placed in any of the other fields available in Locality
OPTIONAL
- locality_name Localities can be created in advance, given names, and used to eliminate the need for entering the same data into multiple catalog records.
Caution
Entering an existing Locality name here will ignore any data that you enter in any of the remaining Locality fields.
Use the pull/sync locality button to view the data that is included in the Locality. If you find that you have chosen the wrong locality name, then you can use the clear all locality button to remove any Locality data and start over.
-
locality_id is the ID assigned by Artos to previously entered Localities. Use the pick locality button to search for localities if you believe there is an existing Locality you could use.
-
locality_min_elevation the value of the lowest elevation at the location. CONDITIONALLY REQUIRED if locality_max_elevation or locality_elev_units are provided.
-
locality_max_elevation the value of the highest elevation at the location. CONDITIONALLY REQUIRED if locality_min_elevation or locality_elev_units are provided.
-
locality_elev_units units to be applid to the values in locality_min_elevation and locality_max_elevation. CONDITIONALLY REQUIRED if locality_min_elevation and locality_max_elevation are provided.
-
locality_min_depth the value of the lowest depth at the location. CONDITIONALLY REQUIRED if locality_max_depth and locality_depth_units are provided.
-
locality_max_depth the value of the highest depth at the location. CONDITIONALLY REQUIRED if locality_min_depth and locality_depth_units are provided.
-
locality_depth_units units to be applied to the values in locality_min_depth and locality_max_depth. CONDITIONALLY REQUIRED if locality_max_depth and locality_max_depth are provided.
-
locality_remark is a free-text field that allows you to record information about the location that does not fit elsewhere. Make sure that any data that could fit into a Locality Attribute is placed there instead of in this catch-all field.
Locality Attributes
Every Locality can include up to 6 attributes in data entry, additional Locality attributes can be added manually or as part of a Locality Attribute: Bulkload.
CONDITIONALLY REQUIRED (if any other Locality attribute information is entered)
-
Attribute is selected from a code table.
-
Value may be selected from a code table, be a number, or accept free text depending upon the attribute selected.
OPTIONAL
-
Units are CONDITIONALLY REQUIRED by some attribute types, otherwise should be left blank.
-
Date is the date the attribute was determined.
-
Determiner is the Arctos Agent that determined the attribute value. Type in all or part of the Agent’s name and use the Tab key to select an Agent.
-
Method is a free-text description of how the determination was made.
-
Remark can be used to add information about the locality attribute, including verbatim determiner(s) if the determining Agent(s) are not found in Arctos Agents.
Spatial
**Documentation: {Coordinates](https://handbook.arctosdb.org/documentation/coordinates.html)
This block includes standardized coordinate data. You can add 1 Spatial block to any catalog record in data entry. Spatial information can be added in one of 4 ways and only one of these may be used during data entry.
Pro Tip
Data entered as Degrees Minutes Seconds, Degrees Decimal Minutes, or UTM will be converted to Decimal Degrees and stored as “as entered coordinates” in Arctos.
CONDITIONALLY REQUIRED (if any other spatial data is entered)
-
coordinate_lat_long_units is the format of the coordinate data being entered and is selected from a code table.
-
coordinate_datum is the datum associated with the coordinates to be entered and is seleceted from a code table.
-
coordinate_georeference_protocol a description of the method by which the coordinates were obtained. Values are selected from a code table.
OPTIONAL
-
coordinate_max_error_distance If an error is associated with the coordinates, enter the numeric distance. CONDITIONALLY REQUIRED if coordinate_max_error_units is provided.
-
coordinate_max_error_units The units associated with coordinate_max_error_distance. Values are selected from a code table. CONDITIONALLY REQUIRED if coordinate_max_error_distance is provided.
Decimal Degrees
Caution
Anything entered here will be ignored unless coordinate_lat_long_units = decimal degrees.
CONDITIONALLY REQUIRED (if coordinate_lat_long_units = decimal degrees)
-
coordinate_dec_lat is the decimal degrees latitude
-
coordinate_dec_long is the decimal degrees longitude
Degrees Minutes Seconds
Caution
Anything entered here will be ignored unless coordinate_lat_long_units = deg. min. sec..
CONDITIONALLY REQUIRED (if coordinate_lat_long_units =deg. min. sec.)
-
coordinate_lat_deg is the latitude degrees
-
coordinate_lat_min is the latitude minutes
-
coordinate_lat_sec is the latitude seconds
-
coordinate_lat_dir is the latitude direction selected from a code table
-
coordinate_long_deg is the longitude degrees
-
coordinate_long_min is the longitude minutes
-
coordinate_long_sec is the longitude seconds
-
coordinate_long_dir is the longitude direction selected from a code table
Degrees Decimal Minutes
Caution
Anything entered here will be ignored unless coordinate_lat_long_units = degrees dec. minutes.
CONDITIONALLY REQUIRED (if coordinate_lat_long_units =degrees dec. minutes)
-
coordinate_dec_lat_deg is the latitude degrees
-
coordinate_dec_lat_min is the latitude decimal minutes
-
coordinate_dec_lat_dir is the latitude direction selected from a code table
-
coordinate_dec_long_deg is the longitude degrees
-
coordinate_dec_long_min is the longitude decimal minutes
-
coordinate_dec_long_dir is the longitude direction selected from a code table
UTM
Caution
Anything entered here will be ignored unless coordinate_lat_long_units = UTM.
CONDITIONALLY REQUIRED (if coordinate_lat_long_units =UTM)
-
coordinate_utm_ew is the UTM east/west coordinate
-
coordinate_utm_ns is the UTM north/south coordinate
-
coordinate_utm_zone is the UTM zone selected from a code table
Record Attributes
Record Attributes include information applicable to the cataloged objects or observations. Every catalog record can include up to 30 attributes in data entry, additional record attributes can be added manually or as part of an Attribute: Bulkload.
CONDITIONALLY REQUIRED (if any other record attribute information is entered)
-
Attribute is selected from a code table.
-
Value may be selected from a code table, be a number, or accept free text depending upon the attribute selected.
OPTIONAL
-
Units are CONDITIONALLY REQUIRED by some attribute types, otherwise should be left blank.
-
Date is the date the attribute was determined.
-
Determiner is the Arctos Agent that determined the attribute value. Type in all or part of the Agent’s name and use the Tab key to select an Agent.
-
Method is a free-text description of how the determination was made.
-
Remark can be used to add information about the record attribute, including verbatim determiner(s) if the determining Agent(s) are not found in Arctos Agents.
Parts
Parts include information about material evidence that supports the cataloged objects or observations. Every catalog record can include up to 20 parts in data entry, additional parts can be added manually or as part of a Part: Bulkload.
CONDITIONALLY REQUIRED (if any other part information is entered)
-
part_n_name is selected from a code table.
-
part_n_count is a numeric value that indicates the quantity of part_n_name.
-
part_n_disposition indicates the availability of part_n_name and is selected from a code table
-
part_n_condition a free-text description of the condition of part_n_name.
OPTIONAL
-
part_n_barcode is the barcode for the container in which part_n_name is located if using Arctos object tracking.
-
part_n_remark can be used to add information about the part.
Part Attributes
Part Attributes include information applicable to a particular part. Every catalog record can include up to 4 attributes per part in data entry, additional part attributes can be added manually or as part of a Part Attribute: Bulkload.
CONDITIONALLY REQUIRED (if any other part attribute information is entered)
-
Attribute is selected from a code table.
-
Value may be selected from a code table, be a number, or accept free text depending upon the attribute selected.
OPTIONAL
-
Units are CONDITIONALLY REQUIRED by some attribute types, otherwise should be left blank.
-
Date is the date the attribute was determined.
-
Determiner is the Arctos Agent that determined the attribute value. Type in all or part of the Agent’s name and use the Tab key to select an Agent.
-
Method is a free-text description of how the determination was made.
-
Remark can be used to add information about the part attribute, including verbatim determiner(s) if the determining Agent(s) are not found in Arctos Agents.
Create Record
Once all your data has been entered, select the Create Record button at the bottom of the screen. Your data will then be added to the bulkloader and await approval.
To approve records for upload to Arctos see How to approve records entered with Data Entry form
Data Entry Tutorial Video
Edit this Documentation
If you see something that needs to be edited in this document, you can create an issue using the link under the search widget at the top left side of this page, or you can edit directly here.