
Content has been moved to How To Github: Contribute to the Arctos Handbook
How To Github: Contribute to the Arctos Handbook
Why Use Github for the Arctos Handbook?
We’ve covered that before. Here, we’ve assumed you have a Github account, have already edited and written documentation in markdown, understand how the Handbook is configured (at least how to contribute without breaking the website!) and now want a little more control and tools at your disposal. We’re also assuming you are not a programmer, so nothing complicated, but rather tools so you can edit quickly! Ready for the next level?
There are four kinds of content on the Arctos Handbook:
- Best Practices, which offer details on how experienced collections handle data and workflow decisions
- Documentation, which describes specific data tables and/or types and defines data fields
- How-to Guides, step-by-step instructions on how to do specific tasks in Arctos
- Resources, for tutorials by the Arctos community and teaching guides that use Arctos
Arctos Handbook content can be created or edited by anyone who is a member of the ArctosDB “Users” team on Github (see “How to Github: Getting Started with GitHub for Arctos”). That team has “write” access to the ArctosDB/documentation-wiki repository in GitHub. Anyone can view the content, but you need to be added to the “Users” team by an Arctos administrator in order to make changes. Arctos users who want the ability to create or edit the Handbook or create or Edit Documentation and “How-to Guides” should email arctos-working-group-officers@googlegroups.com with your Arctos login name and Github login to request to be added to the Github Users group.
We encourage Curators/Collection Managers to engage students in writing “How-to Guides.” However, students will not be able to post them to the wiki site; instead, they will need to submit the content to a member of the ArctosDB “Users” team (e.g., their supervisor) who can then post the content.
 Pro Tips
Documentation pages are written in Markdown, which is dead simple to learn. Here’s a cheatsheet.
How To Edit Existing Content
- Login to GitHub.
- Go to the documentation-wiki repository., main Code tab
- Find the page you want to edit by clicking on Find File next to the Clone or Download button. Type key words next to the documentation-wiki prompt. IMPORTANT: separate words with hyphens for the search to find titles correctly, e.g. “how-to-edit-documentation” *Select the file you have chosen
- Click on “Edit” in the upper right.
- Make your changes on the page. DO NOT EDIT a title because that will change the URL and thus affect linked pages.
- Save the page!
File Names
DO NOT EDIT an existing file name because that will change the URL and thus affect linked pages.
How To Create New Content
- First, login to GitHub.
- Go to the documentation-wiki repository.
Majority of users will be adding to the How-to pages since Documentation is usually reserved for the Arctos Programmers to define the data tables. Below will cover editing and creating content online within your browser (we’re using Chrome).
To edit offline and more advanced editing, consult How to Get the Most Out of Arctos-Github Editing
- Enter the directory
_how_toin the repository- if you get lost in the repo, be sure to click on “< > Code “ tab to navigate back to the main section
- Press “Create new file” in the upper right.
- Give it a name and end it with the extension
.markdown. All “How-to Guide” titles should start with “How to ..” to distinguish tutorials from other Arctos documentation.- Keep titles short
- Avoid punctuation or special characters (e.g., parentheses, commas, colons, dashes, slashes, etc.) because the page title is used to format the URL.
- Remember to give your page the
.markdownextension when naming it! The extension will automatically place the web editor and most local clients in the right edit mode to assist you.
- In the text box, create your new content. The first lines need to be the front matter which must look like this:
---
title: How To Do Anything in Arctos
layout: default_toc
---
The Arctos Handbook supports a few other Front Matter attributes. We also support author and date as an attribute, that, when present, show on the rendered page. An example that (as of this writing) is live on the Handbook site is:
---
title: Agents
layout: default_toc
author: ArctosDB
date: 2016-12-01
---
As an important note, if you do not include front matter on your page, the page will fail to compile, and will return a 404 Page Not Found error. The title you provide is what shows up on the index pages.
-
Headers are used for organization and navigation. Start with a title preceded by a single hash (#). Subsequent sections are given double-hashes (##). Text can be bulleted by single asterisks (*). Use “Markdown” to format your content (see Markdown definition and Markdown cheatsheet. Click on the help (question mark) icon to get some suggestions for doing headers, lists etc.
The important things to remember are:
-
All paragraphs must have a blank space between them, eg,
blah blah

blah blah new paragraph
This is also true when transitioning paragraph types, such as code blocks or blockquotes.
-
Numbered and bulleted lists are generated automatically. Just start with
1.and every subsequent number will iterate (regardless of actual numerical progression, so 1, 1, 1 will become 1, 2, 3). Bullets can be a single asterisk or a dash. -
Table-of-Contents entries are generated at headers. Headers are created by leading with one or more
#. For example:# Page title This is a page about stuff and things ## First subheading This is actually a really interesting topic. ### Sub-subheading You see, .... ## Second subheadingNote that simply emphasized text (via
*emphasized text*) nor bold text (via**bold text**) will generate either a table of contents entry or an HTML anchor to link to. Do not simply use bold text for sections!!
-
- To add an image, see below.
- Save the page!
- Pages will dynamically appear on the How to Index page and be searchable on the Arctos Handbook site now.
- If you edited a documentation page, the update will not be automatic; if you’re comfortable editing HTML directly, you can insert it into the appropriate index page (eg, for a page in
_documentation, the_documentation/index.htmlfile), or otherwise ask dustymc@gmail.com, mkoo@berkeley.edu, or ccicero@berkeley.edu to take care of it for you.
- If you edited a documentation page, the update will not be automatic; if you’re comfortable editing HTML directly, you can insert it into the appropriate index page (eg, for a page in
Relevant Markdown links:
-
Github is the place to go for the Arctos Handbook repository that will help you function as an Arctos user or operator.
-
Basic guide on how to contribute markdown content to the Handbook
-
If you have an Arctos Issue, post it on the Issues site. There you can also view and comment on current issues, search on past issues (closed issues), too. Follow our guide on How to Use Issues in Arctos.
-
Mastering Markdown on Github - specific to Github-flavored markdown
Tips & Cheats:
- Github-flavored Markdown Cheatsheet ready for printing!
- Live Markdown Editor - The online markdown reader will display a preview as you type.
- Word to Markdown converter - Upload as Word doc, get back Markdown
- Convert a Google Doc to Markdown - a little bit of setup via Google Script and then you’ll have a handy tool
- Add a hidden comment to a document - want to keep a note in a document that you don’t want to show up to handbook readers? Prefix it with [//]: # Note - this will only work for an entire line, it cannot be used “in line” to hide a few words in a block of text. [//]: #test
How To Create Relative links
When creating relative links, Github Markdown will recognize the following:
Link to [this here page](/how_to/page.html)
and form a URL relative to the site’s base url. Ours is ‘https://handbook.arctosdb.org’
How To Add a Table
In the page where you want to insert a table, follow the guide for Organizing Data into Tables in Github
How To Add Images
Embedding images in a markdown document can be a little tricky as it’s not always intuitive in my view. The markdown is straightforward however. It’s the same format as hyperlinking text (use square brackets for visible text, use parenthesis for url) with an additional “!” at the beginning:

- Give the image a URL: In a new tab, go to the documentation-wiki
uploadsfolder, and click the “upload files” button.- If you want to use the same tab, be sure to commit your progress, first.
- Drag and drop the image or browse your computer for the image(s) and click the “commit changes” button.
- Click on the desired image to preview it
- Click on the “Download” button to get the raw URL. If the URL does not begin with
https://raw.githubusercontent.com, the link will not work. Copy this URL to your clipboard. - Go to back to the page where you want to add the image, and click on the image icon above the text box. Insert the URL. Only the URL (not the image) will show up in the text box. In raw Markdown, you can specify an image with
. - Hit the preview button to ensure you’ve correctly included the image
- Commit your changes
So how to add images to your markdown page? Two methods work:
1) Editing on Github document. If you’re using the online Github editor, then simply drag the image from your desktop to the online editor and it will simulateously upload the image and render the markdown.
2) Working in a Text Editor & Github Desktop. You can add the image to the local folder of your repo directly. For images place theme here: /images/uploads/your_image.jpg
In your markdown document where the image will be added, use the standard markdown format for embedding images but here we can use the base URL (https://handbook.arctosdb.org) to define the image path.

How to resize images
Without editing the image itself, you can resize the image as you would any image in regular html– adding the parameters for width and height.
Example in Markdown:


This may be too large for your page so we can reduce the width by 50% using the actual HTML that the markdown is rendering so you can adjust the parameters exactly the way you want.
Example in HTML:
<img alt="Arctos logo" width="128" src="https://handbook.arctosdb.org/images/favicon256.png"/>
How To Add Videos
- Create a YouTube Video using the Arctos login: arctos.database@gmail.com.
- Email the database administrator for the password.
- Add the link to the page.
Arctos-specific Markdown Code You Can Copy!
Copy the code below the image and paste into any other document to use the image.
 Pro Tip
 **Pro Tip**
 Caution
 **Caution**

Video Tutorial

**Video Tutorial**


 FAQ goes here?
<img src="https://raw.Githubusercontent.com/ArctosDB/documentation-wiki/gh-pages/tutorial_images/Bear%20FAQ.jpg" width="50">
**Add FAQ text here?**
How To Edit the Arctos Handbook Locally
Pro Tip
Text editors
Editing and creating pages for the Arctos Handbook in the online Github interface is easy and straightforward. However, at some point, you may need to do more, such as move and edit more than one file at a time. Or perhaps a new page needs more time to complete. This is a step-by-step introduction to working with the Arctos Handbook Github repository.
First, let’s download and install a desktop tool that allows a local folder to communicate with Github– Github Desktop (PC or Mac)
Second, let’s make sure you have a text editor that works well for the task. Most text editors for editing code would work. This can be an intensely personal decision so we’re not going to do any comparisons here but if you do not have a preference, I suggest trying out Brackets. It’s a free, open-source code editor (Adobe) that works well for this task on either Mac or PC.
If you want to work on markdown content offline or just not in a browser, there are a number of great text editors to use. Here are some FREE favorites:
- Atom (PC, MacOS, Linux, free)
- Brackets (MacOS, PC, free from Adobe)
- Notepad ++ (PC, free)
- Text Wrangler (MacOS, free)
Try using Github Desktop if you want to sync your work with the documentation-wiki repository locally.
Now you’re ready to get started.
Clone a Github Repo for offline editing
- Open Github Desktop. The first prompt will be to sign in with your Github account. (If you don’t have the prompt, go to Github Desktop -> Preferences Account tab).
- Now you will make a copy of a Github repository onto your desktop, File -> Clone repository. A list of Github repos that you have access should appear. Choose documentation-wiki. Select a folder for the copied files. It’s best to create a dedicated directory for any code repos.
- We’ll get back to Github Desktop after we open and edit a file below.
Open and edit in a Text Editor
For first time user of Brackets, let’s make life a little easier with a plugin. Plugins are typically third-party contributions to extend Brackets’ functionality.
We will install one to preview your Markdown code as you type- fun and useful!
- Go to File -> Extension Manager (or click on the lego brick on top right)
- Search for ‘markdown preview’
- Click install for “Markdown Preview” extension (developer’s website)
- Reload application if prompted
Now you’re ready to start editing or creating a new markdown page in your cloned repo. These changes are on your LOCAL directory only until you are ready to have it “committed” to the online master repository.
- Navigate in your cloned repo to the “_how_to” folder. A word of caution: be sure NOT to rename directories or remove any contents of the “git” folder as it will corrupt your copy, or worse the master repo. (If you do, don’t panic, commits can be reversed!)
- Open a file you want to edit (any file with *.markdown extension). Right-click and choose to open with Brackets. Once the file is open, click on the blue Markdown icon on the right to enable preview as you code.
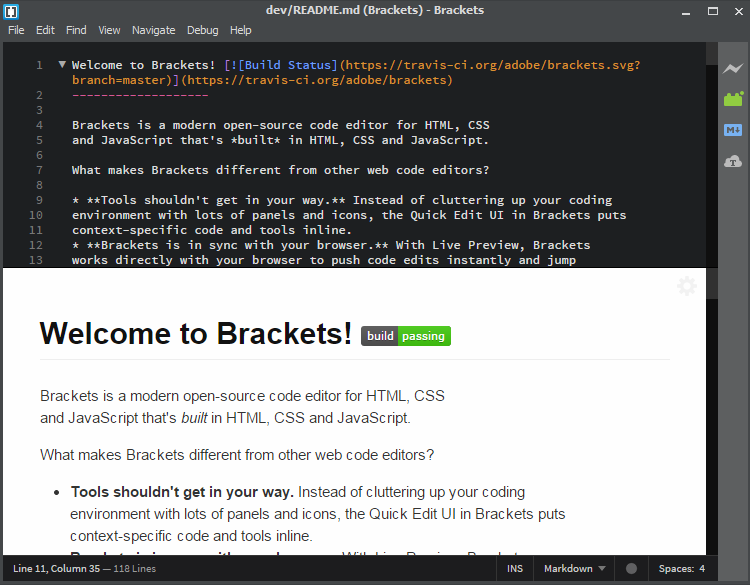
Try it out! As you type and add formatting, the preview will show how the rendered page will look. Caveats: it will NOT show you the final rendering on the Handbook site as Bracket cannot render the entire website’s framework such as the author and date that are added at the bottom of each page based on the front matter fields.
Also note that Brackets (like the other suggested text editors) helps you code with visual cues, auto-finishing braces, and you can add other bells and whistles with other plugins.
Save edits and sync with Github repo
Once you are ready to post your changes to the Github repo and thus have it compiled and rendered for the website, you are ready to use Github Desktop.
Open Github Desktop and you will see your changes in the cloned repo under the Changes tab
 Green highlights are additions and red are deletions.
If you are ready to push your changes to the repo, then type a short summary of your modifications in the ‘Summary’ box with optional descriptive text in ‘Description’, and click on Commit to gh-page.
TIP: If you only want some but not all your changes committed, you can select which ones by checking off/on the changes on the left.
Search Terms
create documentation
edit documentation
create How To
edit How To
Video Tutorials
Edit this Documentation
If you see something that needs to be edited in this document, you can create an issue using the link under the search widget at the top left side of this page, or you can edit directly here.