How To Add Geology Attributes to a Locality
Documentation: Attributes
Locality Attributes are used to attach geology information to a locality. Each locality may contain any number of attributes, each with a determiner and method. This How-To documents the process for adding Attributes to a Locality.
Bulkload Locality Attributes
To bulkload locality attributes use the Locality Attribute Bulkload Tool.

Caution
Be sure that the attribute(s) you plan to add to the locality apply to ALL cataloged items using the locality. If this is not the case, clone the locality using the Clone Locality button at the bottom of the edit locality page and add the locality attributes to the new cloned locality, then change the locality for the appropriate collecting events following the instructions in How To Create a New Collecting Event for a Locality to reflect the new locality.
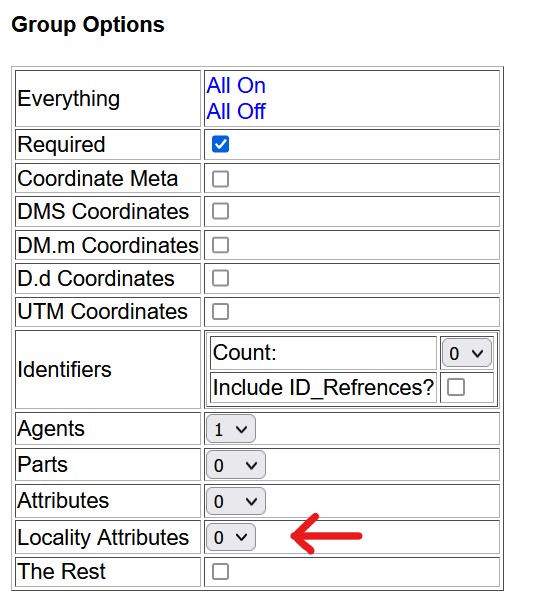
Locality attributes can also be added as part of a normal catalog record bulkload which creates new localities. To use this method, just add Locality Attributes to your bulkload builder:

Then complete the required fields (locality_attribute_type and locality_attribute_value) along with any other fields for which you have data. Up to 6 locality attributes can be added for any single record locality in the bulkload file. NOTE Locality attributes and values must conform to terms in the code table.
Create or Edit the Locality
If the locality already exists, you can edit the locality following the instructions in How to Edit a Specific Locality.

Caution
Be sure that the attribute(s) you plan to add to the locality apply to ALL cataloged items using the locality. If this is not the case, clone the locality using the Clone Locality button at the bottom of the edit locality page and add the locality attributes to the new cloned locality, then change the locality for the appropriate collecting events following the instructions in How To Create a New Collecting Event for a Locality to reflect the new locality.
Otherwise, create the locality from scratch following the instructions in How To Create a Locality.
Once you have the locality ready to edit, you can add the locality attributes.
Add Locality Attributes
Scroll to the bottom of the locality edit page and you will find the Locality Attributes form.

Complete the required fields plus any of the other fields for which you have information and select “Save Locality Attributes”. If you have more than three locality attributes to add, simply use the “Add a row” function until all of your locality attributes have been added. There is no need to save locality edits, saving locality attributes adds the attribute(s) to the locality.
For more information about Locality Attributes and the data format or code table controls for the locality attribute fields see the documentation.
Edit Locality Attributes
If you need to edit a locality attribute, edit the locality, find the locality attribute, make the appropriate changes, and select “Save Locality Attributes” at the bottom of the list of Locality Attributes.

Delete Locality Attributes
If you need to delete a locality attribute, edit the locality, find the attribute, select “Delete” in place of the Locality Attribute, then select “Save Locality Attributes” at the bottom of the list of Locality Attributes.

Edit this Documentation
If you see something that needs to be edited in this document, you can create an issue using the link under the search widget at the top left side of this page, or you can edit directly here.
