How To Create and Edit Parts
NAVIGATION:
From the catalog record, click on the Parts Tab OR the “Edit” hypertext in the corner of the Parts detail

Add Parts to a catalog record
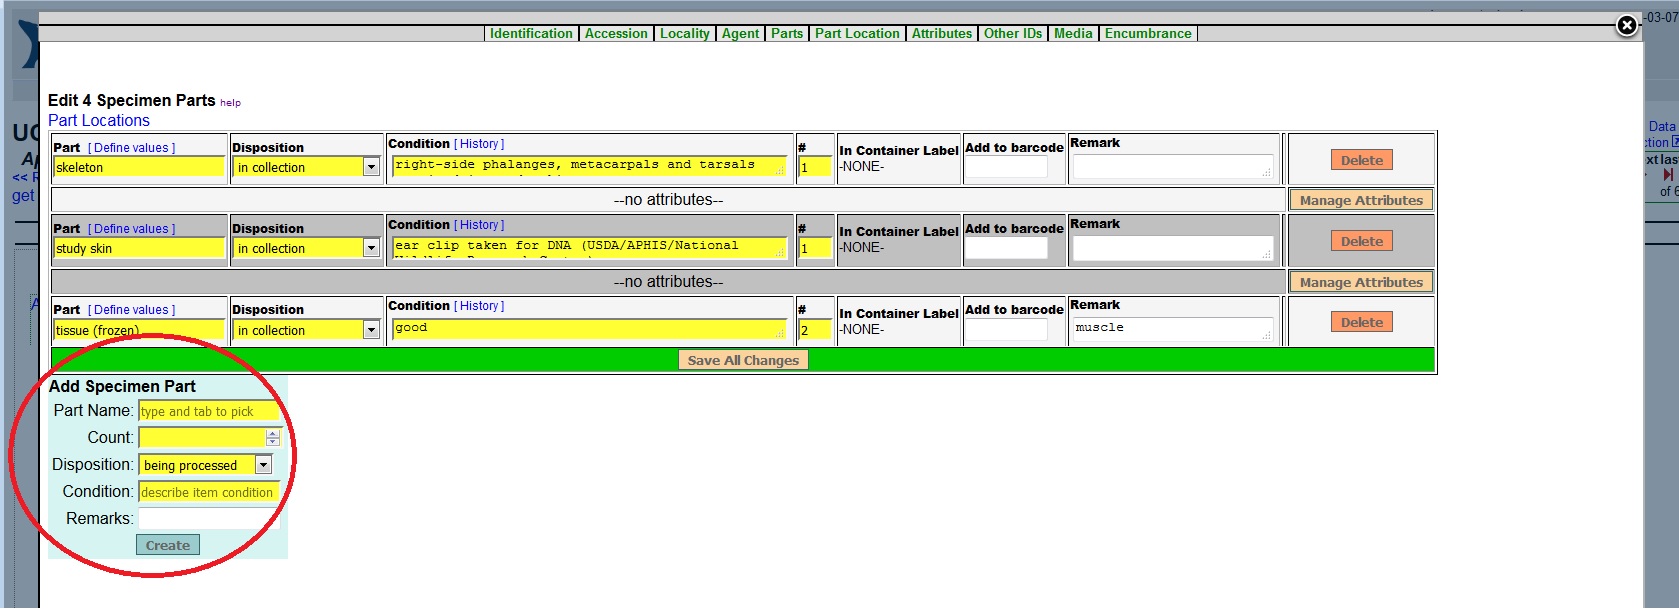
Use the blue “Add Specimen Part” box at the bottom of the screen to create new specimen parts:
- Begin to type desired part name in the Parts field and click “TAB”. A pop-up menu will appear with value options. Click on the appropriate part name. TIP: Click on the “Define Values” hypertext in the Part field above to view a full listing of value options.
- Indicate the number of parts/specimens in the Count field.
- Select Disposition from the drop-down menu.
- Describe specimen Condition (e.g., “good,” “tail broken,” “dissected”)
- Record any pertinent Remarks.
- Click the “Create” button. The new part will appear in the Parts Table above. Barcodes can now be added to track where parts are located (see How to Create and Edit Containers for more details).

EDIT Parts in a catalog record
- Edit any existing information saved in the Parts fields and click the “Save All Changes” button at the bottom of the table to commit edits.
- Scan or type in the relevant barcode to place a Part in an existing Container (see How to Create and Edit Containers for more details). After saving, the container location can be confirmed by clicking on the Part Location Tab.
DELETE Parts from a catalog record
- Delete any attributes associated with the part to be deleted. Parts that have an associated part attribute, such as preservation cannot be deleted without first removing the attribute(s). [//]: #From https://github.com/ArctosDB/documentation-wiki/issues/215
- Click on the “Delete” button to remove Parts.
Parts Table Overview Tutorial Video
How to Create & Edit Parts Tutorial Video
Parts Code Table Overview Tutorial Video
Edit this Documentation
If you see something that needs to be edited in this document, you can create an issue using the link under the search widget at the top left side of this page, or you can edit directly here.


