How to Create an Accession
 Pro Tip
Accessioning is the formal act of legally accepting an object or objects to the category of material that a museum holds in the public trust, or in other words those in the museum’s permanent collection. Because it commits staff time, space and other resources to the proper care of this material, it is important that acquiring material for the collections be done in a thoughtful, inclusive way that reflects the best interests of the museum and its audiences, and can be sustained by the available resources.
 Is an accession number required for all specimen records?
Yes, an accession number is required, but if you choose not to create individual accessions or do not have that info available, you can create a legacy accession (e.g. 0000.00.Herp). You can later move groups of specimens to other accessions as you find the documentation or discover reasons to create them.
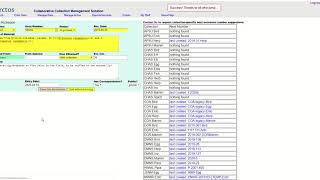
To create an accession, from the Arctos main menu select Manage Data > Transaction > Create Accession
You will be directed to a page where you can enter information required to create a new accession.
Create Accession Recommendations:
Collection:
- Choose from the drop-down menu the collection that the accession will be associated with.
Accn Number:
 Caution
Some institutions use Accession Number in place of Catalog Number for a specific cataloged item. In Arctos, these numbers are not the same. There may be multiple cataloged items in a single accession.
- Choose a number to identify the accession. Since accessions are specific to individual collections, their format is customizable. NMU:Mamm uses “year.number” (eg, 2013.02). For example, if this will be the first (or only) accession from the year 2013, the accession number would be 2013.01. If this is the second, third, or fourth accession the numbers would be 2013.02, 2013.03, or 2013.04.
Status:
- Always choose “In Process” if you are creating a new accession that will be added to in the future. Choose “Complete” if you do not expect to be adding specimens or data to this accession in the future.
Rec. Date:
- The date when the first specimen in the accession was acquired. If you are uncertain of this date, it is appropriate to use 1 January of the year the accession began. E.g., 2015.01 = Rec. Date 1 January 2013.
Nature of Material:
- Provide a brief explanation of the specimens and data that will be associated with this accession. For example, “salvaged roadkill mammals contributed during 2015”, “specimens collected during 2016 Mongolia expedition”, “wolf skulls received from MI Department of Natural Resources in 2017”.
Received From:
- Provide the Agent name for the person or entity who has primary responsibility for the specimens that are part of the Accession. For example, if the specimens are from a trapping trip you might identify the expedition leader. If appropriate you can also identify an organization (e.g., Michigan DNR) as the source of the specimens. Note that if the person or entity to be named has not yet been defined as an Agent within Arctos then they will need to be created as an Agent. See the How to Create Agents guide.
From Agency:
- If the “Received From” is a person, identify their agency here. E.g., Received From: Kurt E. Galbreath; Agency: Northern Michigan University. This field does not require controlled vocabulary (e.g., you do not need to provide a specific Agent).
How Obtained?:
- Choose from the drop down menu how the data were obtained. For example, if specimens were captured in the wild, you would want to select “field collection”. For specimens donated from an agency or other collection, “transfer” or “repository agreement” might be appropriate. Roadkill, window strikes, or animals that the cat dragged in would be considered “salvage”.
Est. Cnt.:
- This stands for “Estimated Count”. Provide an estimate of the number of specimens that can be expected under the accession.
Remarks:
- This provides an area for you to expand on additional information about the accession here. For example, you might provide information about the availability of documents associated with the accession (e.g., collecting permits, maps, etc.), or contact information for people/entities associated with the accession. Also provide a location or status of the specimens and specimen data (e.g., specimens reside in the mammal’s lab freezer, data is in the digital accession file).
Entry Date:
- This is by default the date that you create the accession.
Has Correspondence?:
- Select “Yes” if there are records (e.g., emails, letters, documented phone calls) associated with this accession. For example, emails between the curator and an agency donating specimens could be retained in an appropriate accession folder to document the donation, in which case the accession would have correspondence.
Public?:
- If you want this accession to be seen publicly, choose “public”, if not, choose “private”. Generally it is best to choose “private” as accession documents are primarily for internal purposes. Also, this would protect contact information of individuals that is included in the accession documentation.
Completing your accession
Once you are satisfied with all the information you have entered about your new accession, click “Save this Accession” in the pink box at the bottom of the page.
After saving, the page will refresh and show you an updated layout for your accession documentation. At this time you can associate permits or projects with the accession or link barcoded containers to the accession.
Be sure to click “save changes” at the bottom of the page before leaving the page.
How to Create an Accession Tutorial Video
Edit this Documentation
If you see something that needs to be edited in this document, you can create an issue using the link under the search widget at the top left side of this page, or you can edit directly here.

