
Catalog Record/Data Entry Documentation
How to Bulkload Catalog Records
Navigation: Tools Directory > Enter Data > Bulkload Catalog Records
If you do not have a Bulkload Catalog Record Data sheet, begin with the Bulkload Builder.
Bulkload Builder
Navigation: Tools Directory > Enter Data > Bulkload Builder
The first small table includes groups of fields available to use. Select which ones you want to save time on selecting individual fields in the larger table below.
From the larger table, you will see the fields that were selected as part of the groups selected above.
If there are fields that will never be used by your collection and therefore do not need to be in your file. Unselect them.
Now click on “Get CSV” located above the small table and below the large table. Your file will automatically download.
Helpful Hints:
- Any header can be deleted, added, or rearranged in the excel sheet manually.
 Caution
Be sure edited cells do not have an invisible lead or end, otherwise Arctos will reject it.
- You may notice the bulkload template has a large number of fields for parts, attributes, collector, etc. These are there only if you need them. You may or may not use them all and that is ok. They can be left blank or left out of the template.
 Pro Tips
-
The bulkloader only allows for four part attributes per part. If you need to add more attributes, consider bulkloading the records without parts and then bulkloading parts with the Part Bulkload Tool.
-
IT IS VERY HELPFUL TO HAVE THE SINGLE DATA ENTRY PAGE OPEN WHILE ENTERING DATA INTO THE BULKLOAD DATA SHEET. Much of the bulkloader works off of the single data sheet and many things are “text sensitive”, meaning Arctos will not accept your file if something does not already exist within Arctos (ie; agents, parts, attributes, etc) OR if something is spelled incorrectly.
-
Agents can be entered as “unknown”, but blanks are also an acceptable value.
-
If no Catalog Number has been previously assigned you can leave the CAT_NUM blank if you want Arctos to automatically assign the next available catalog number.
Caution
When trying to fill a gap in the available catalog numbers, it is wise to view what is available and enter them manually. Only allow Arctos to assign numbers if you have no gaps in your assigned catalog numbers and are using an integer catalog number format.
Excel Helpful Hints:
- Excel generally defaults dates to the (mm-dd-yyyy) format, whereas Arctos likes them to be in (yyyy-mm-dd) format. Excel will also re-format the date back to how it likes if you close and re-open a CSV file. To change the date format at any point, do the following:
- In the Home tab of excel in the “Number” section there will be a drop menu. With the cell(s) you need selected, click the drop menu and scroll to the bottom and select Text. This tells excel to stop assuming it knows what to do with the date and keep it the way you want it.
- Another way to do this, which is especially helpful with a re-opened file, is to again, select the cell(s) you want and click the drop down menu in the “Number” section of the Home tab.
- Select “more number formats” at the very bottom.
- If “date” is not already selected, do so and it will bring up all the different formats for dates.
- In the “Locale (location)” drop down menu, select “English (South Africa)”
- South Africa is your new best friend because they have the date format that you need. Select “yyyy-mm-dd” format and click ok.
- Your highlighted cell(s) should automatically change to Arctos date format. Woot!
For informationa about required data and individual fields, see [How To Enter Data for a Single Record: Data Entry Details](https://handbook.arctosdb.org/how_to/How-to-Enter-Data-for-a-Single-Record.html#data-entry-form-details
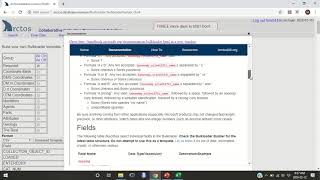
Before Bulkloading
At the bulkloading page, just above where you will click to choose your file to upload, Arctos will tell you if the bulkloader is currently being used.
- “There is nothing in the staging table. You are free to proceed”
- The bulkloader is a shared resource that can only be accessed by one user at a time. If another institution is bulkloading, this page will tell you who is using it and show their contact information (if they have any).
- If you are using the bulkloader, your name and contact information will be shown and will remain there if you do not clear the staging table after you are done. If you forget to delete your data from the staging table, you may end up getting some emails from other institutions asking when you will be done.
Ready to Bulkload
- Choose your file and click “Upload this file”.
- You will be brought to a page that says “There are (#) records in the staging table. They have not been checked or processed yet”. (#- the number of records you are trying to upload).
- From here you will choose from the following choices; Check and load these records, just load these records, or cleanup.
- “Check and load these records” - By-passes the need for the records to go into the bulkloader where they would normally be looked over by an administrator.
- “Just load these records” - Moves the records to the “personal” bulkloader where your administrator can approve them like any other single data entry.
- “Cleanup” – If you have last minute data that needs to be added or changed. Once you do that, go back and choose one of the two other choices. For practical purposes, choose “Just load these records”.
- You will be brought to a new page that says, “Your records have been checked and are now in the table bulkloader and flagged as loaded=’BULKOADED RECORD’. A data administrator can un-flag and load them.” After that it will say in blue “please delete from the staging table”, click that then click “yep, delete away” and you are all set.
- Your data should now be in the bulkloader awaiting approval.
IMPORTANT: DELETE YOUR DATA FROM THE STAGING TABLE
How to Bulkload Data Tutorial Video
Edit this Documentation
If you see something that needs to be edited in this document, you can create an issue using the link under the search widget at the top left side of this page, or you can edit directly here.