
How to Github: Contribute a Video Tutorial to the Arctos Handbook
Short video tutorials help Arctos users learn how to do tasks in Arctos. If you would like to contribute a short video tutorial to the Arctos Community Handbook, read on!
Video Tutorial Guidelines
Sign Up
Sign up for a tutorial topic here, or feel free to add new tutorials to the list. You can also break up listed topics into more specific, shorter segments if desired. Use any program to record your tutorial. For quick demos on how to record a screen share, check out the instructions below, ‘How to Record in PowerPoint’ or How to Record in Zoom.
Keep tutorials SHORT
Tutorials should be 10 minutes or less, ideally 1-4 minutes. A topic can be broken into multiple tutorials if needed rather than creating one long recording. This way, users can easily pick out the exact step-by-step action they need demonstrated. Overview tutorials can be longer (5-8 mins), e.g., Loans in Arctos.
State the Tutorial Topic
Start your tutorial by stating the title of your topic (e.g., “How to Edit Agents in Arctos”). After stating the topic, orient viewers to where you are in the database. You can either start from the main search page (e.g., “To edit an agent, navigate to Manage Data -> Agents….”), or start directly on the screen that you will be discussing (e.g., “From the Agent search page, click on…”).
Introduce yourself
Feel free to state your name and institution at the beginning (e.g. I am … from collection …) or at the end (e.g., “This tutorial was presented by…”) of your tutorial.
Define and Demonstrate
Define vocabulary and demonstrate step-by-step instructions for your tutorial. If needed, give a brief sentence defining your topic (e.g., “An Encumbrance masks records or parts of records and can be used to delete records….”, “In Arctos, records can be linked using Relationships…”). Don’t just talk theoretically about how to carry out an action in Arctos - walk viewers through a real example demonstrating the exact steps needed to complete the action so users can see what happens when various buttons are clicked or the different screens involved. Clearly state and show the tabs, drop-down menus, or buttons needed, as if you are giving a recipe for how to replicate your actions.
Include Warnings and Pro Tips
Be sure to mention anything a user should know or avoid when interacting with a given feature. For instance, when creating new agents, users should first double-check that the agent profile doesn’t already exist; users should pay close attention to any red boxes or “this is scary” warnings that could alter records belonging to other institutions; or perform a QC check on bulkloader csv files to ensure there are no hidden spaces or characters.
Name the File
Rename your MP4 files to match the tutorial topic text on the sign-up sheet and drop the files into the Tutorial MP4s folder. Tutorial file names should start with “how to” and include underscores, e.g., (e.g., how_to_edit_agents.mp4).
Update the Sign Up Sheet
Be sure to enter the date that you created the tutorial next to your name on the sign-up sheet (a quick way for us to know that you have completed the task) and notify Emily Braker that the tutorial is ready for addition to the Handbook. Tutorials will be linked to the Arctos YouTube channel and the associated Documentation or How-To pages.
Still have questions?
Contact Emily Braker
How to Record in Zoom
Download Zoom Client
You must download the desktop version (“Zoom Client for Meetings”) in order to access the recording feature.
Record
Share screen and record in Zoom
New Meeting -> Join with Computer Audio -> Share -> Screen -> Record button

OR
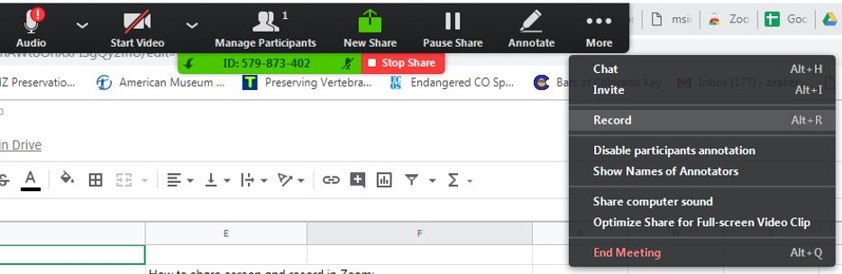
You can navigate from your shared screen by selecting More -> Record from the control bar at the top of the screen while in share mode.
Review the Recording
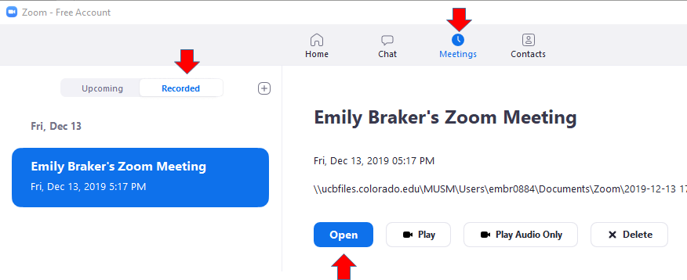
Zoom recordings are autosaved once a meeting is ended. To view your recording, click the “Meetings” clock icon and select “Recorded.” Click on the desired recording to play back or see the storage file location on your computer.
Save the Recording to the Tutorial MP4s Folder
When you are satisfied with your recording, rename your file to match your tutorial topic and save to the Tutorial MP4s folder.
How to Record in PowerPoint
Record
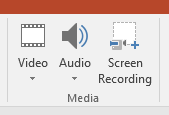
Go to the INSERT Tab in PowerPoint, and click on “Screen Recording” in the Media Group.
Once you’ve navigated to Arctos, click on the “Record” button in the control panel.
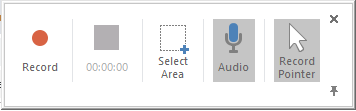
Make sure Audio and Record Pointer options are highlighted. Once finished with your tutorial, click the “Stop” button on the control panel.

Review the Recording
Your video will automatically appear in PowerPoint.
Save the Recording to the Tutorial MP4s Folder
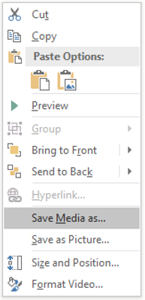
To save as an MP4, Right-click on movie -> Save Media as.
Rename your file with your tutorial topic and save to the Tutorial MP4s folder.
Edit this Documentation
If you see something that needs to be edited in this document, you can create an issue using the link under the search widget at the top left side of this page, or you can edit directly here.