
How To Install Cryovials into a Freezer Box
This guide provides the steps needed to install (i.e., scan) barcoded vials into a freezer box.
Required Preparation
Before installing cryovials into positions in a freezer box you must have completed the following:
-
Every cryovial must have its own unique barcode in Arctos (see (NEEDS DOCUMENTATION)).
-
The freezer box must already exist with a barcode in Arctos (see How to Create a Freezer Box Container)
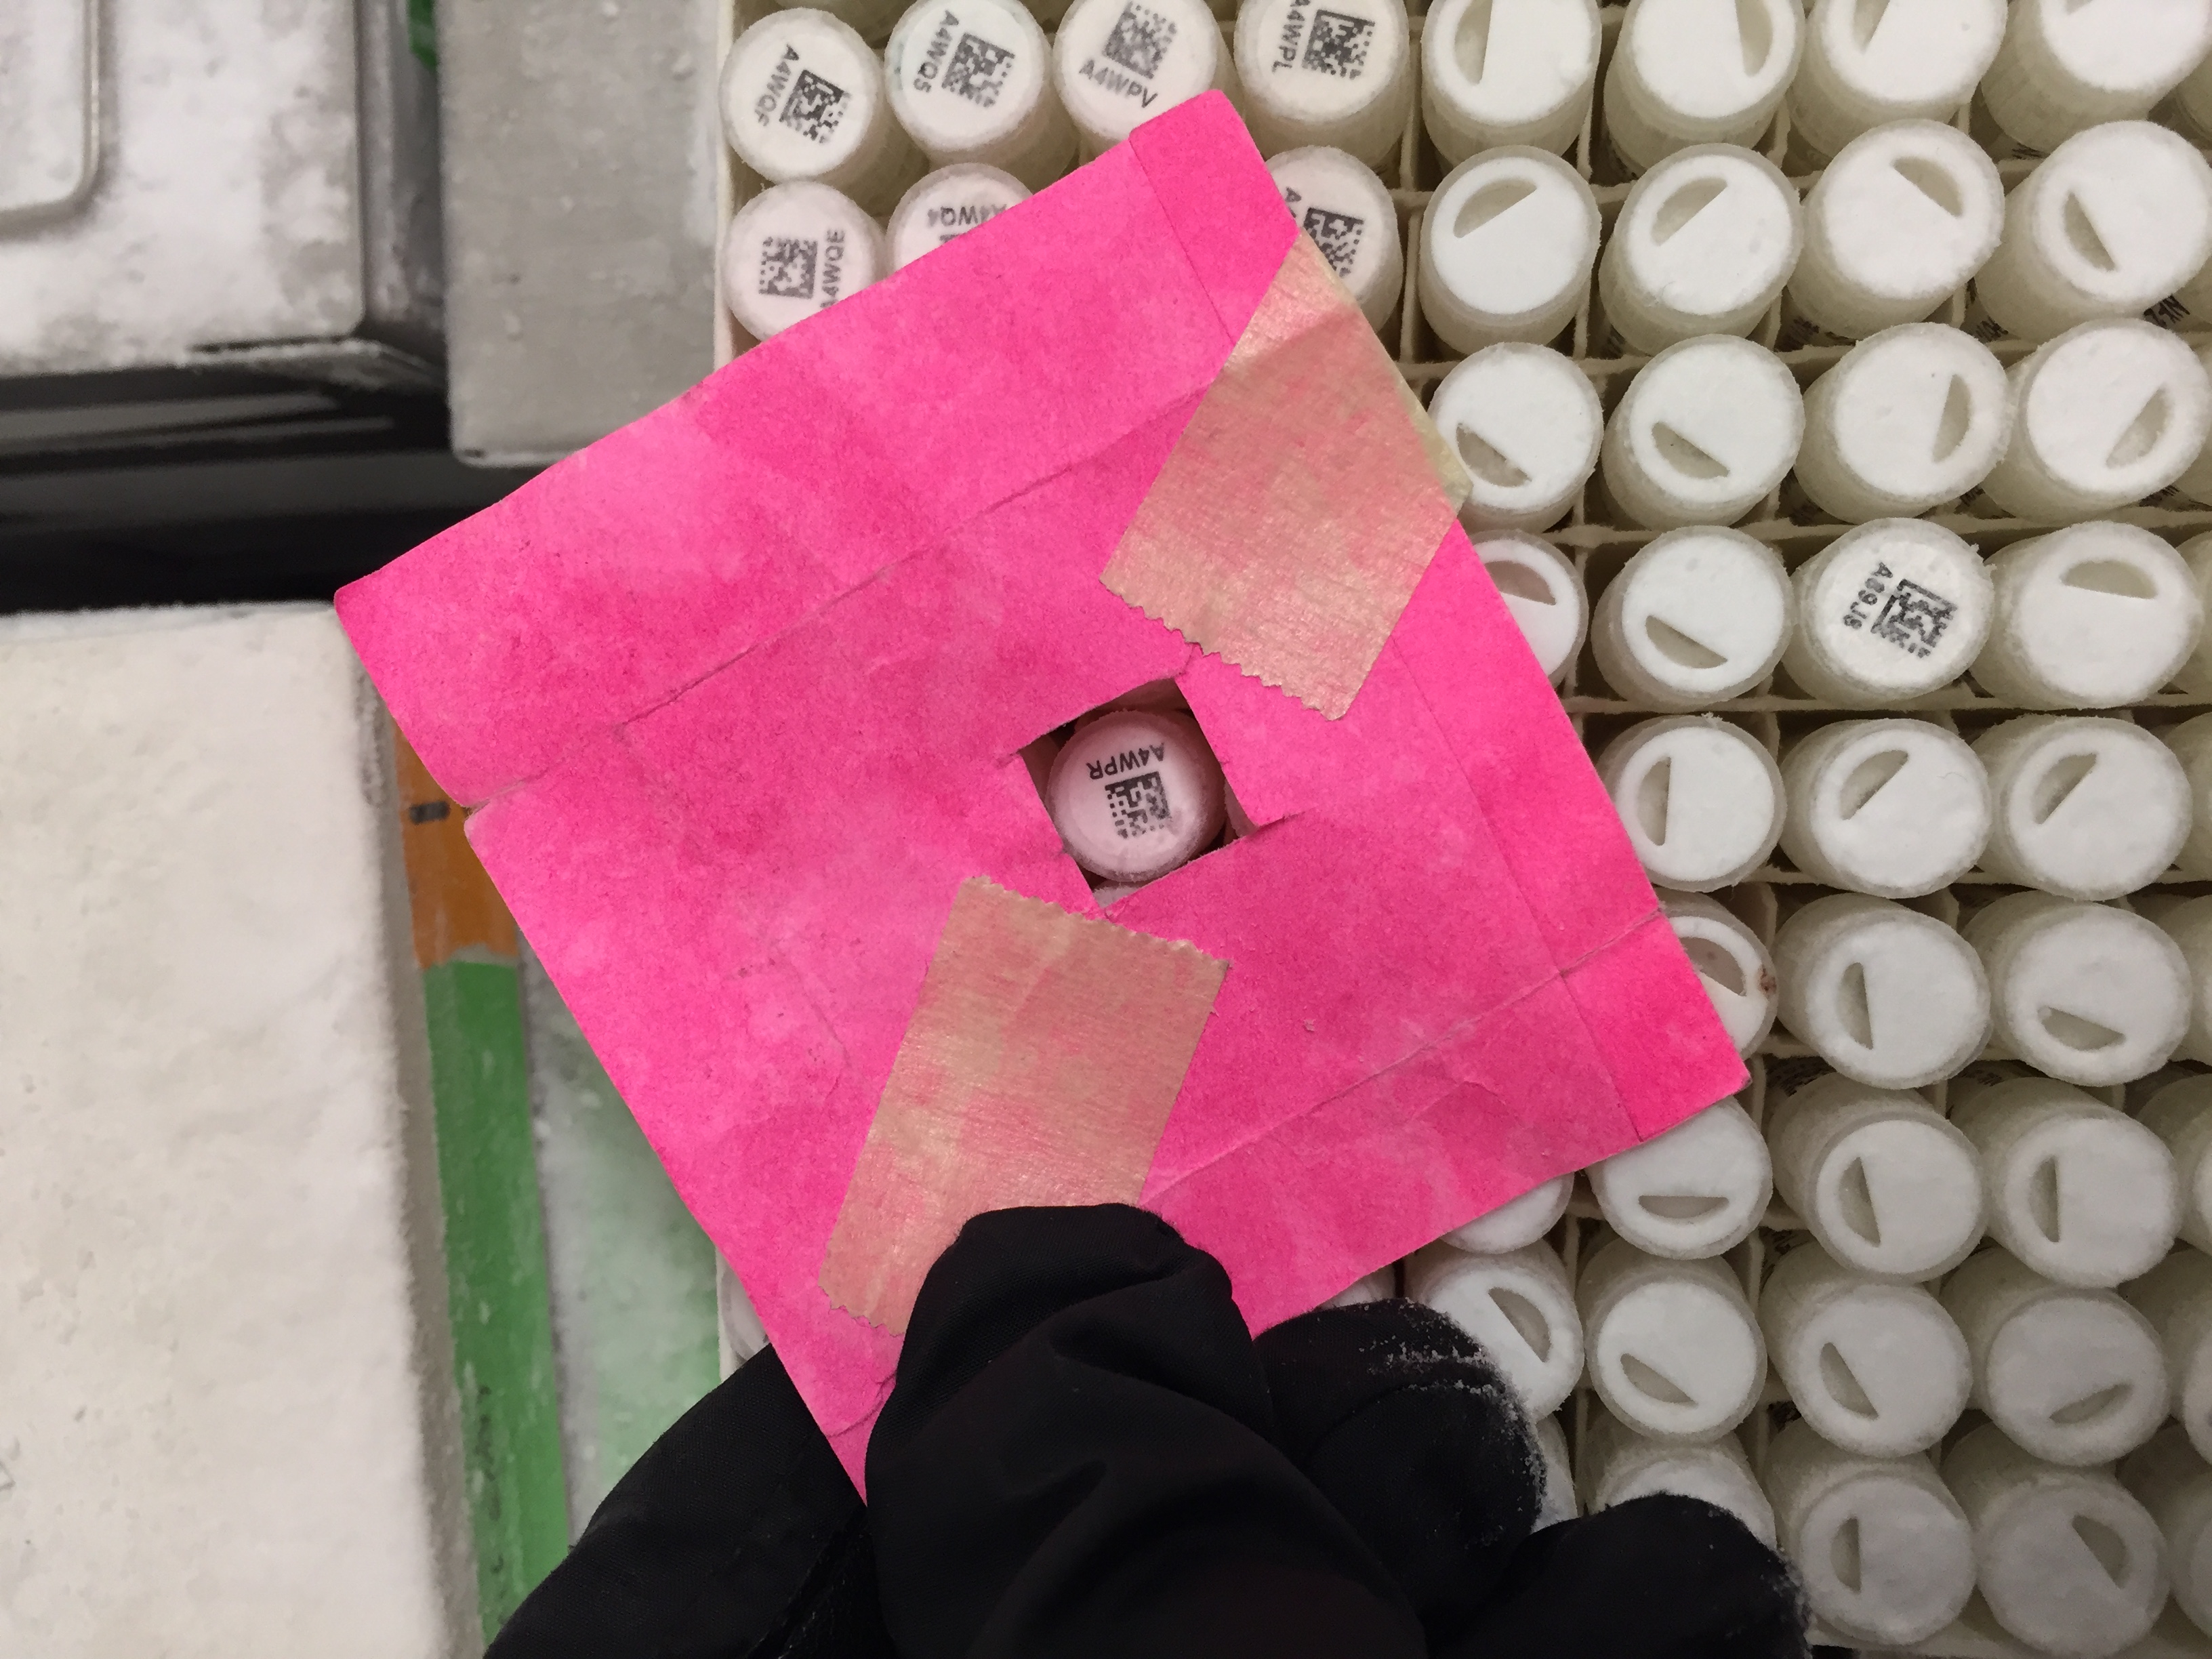
Tip Because cryovial barcodes are small and very densely packed, adjacent barcodes are easily scanned by mistake; you can prevent this problem by using a piece of paper with a barcode-sized hole to block all neighboring barcodes except the one that you intend to scan
Recommended Preparation
- Ensure that the scanner is correctly programmed:
-
set the scanner to Tab after scan otherwise the cursor will not automatically move to the next cell in the box
-
scanners may not scan correctly if Caps Lock is on, be sure you know how the scanner will operate before starting to scan cryovials into position
Tip Test scan a vial into MS Word or Excel to see if the results are what you expect
-
Completing the Installation
Once the steps above are complete, you are ready to install the cryovials into the freezer box.
-
Log in to Arctos
-
From the Arctos main menu select Manage Data > Object tracking > Find Container
-
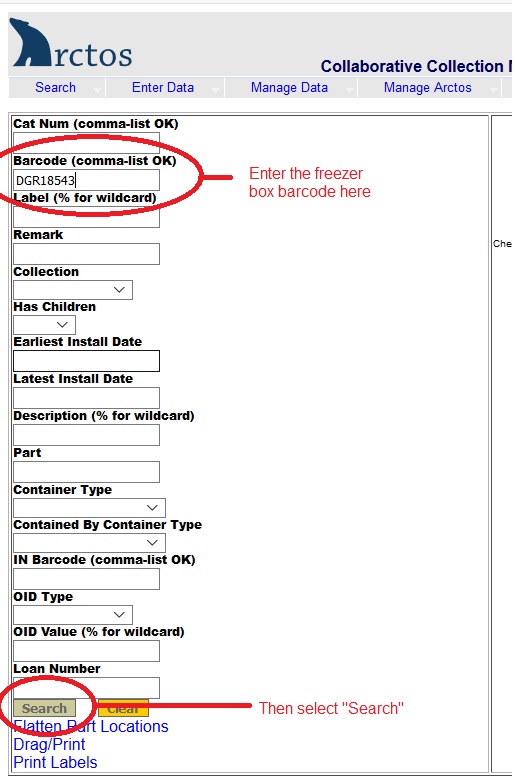
Scan the freezer box barcode into the Barcode field and then select Search
- Select the little box next to your container and a list of details will pop up in the right of the page
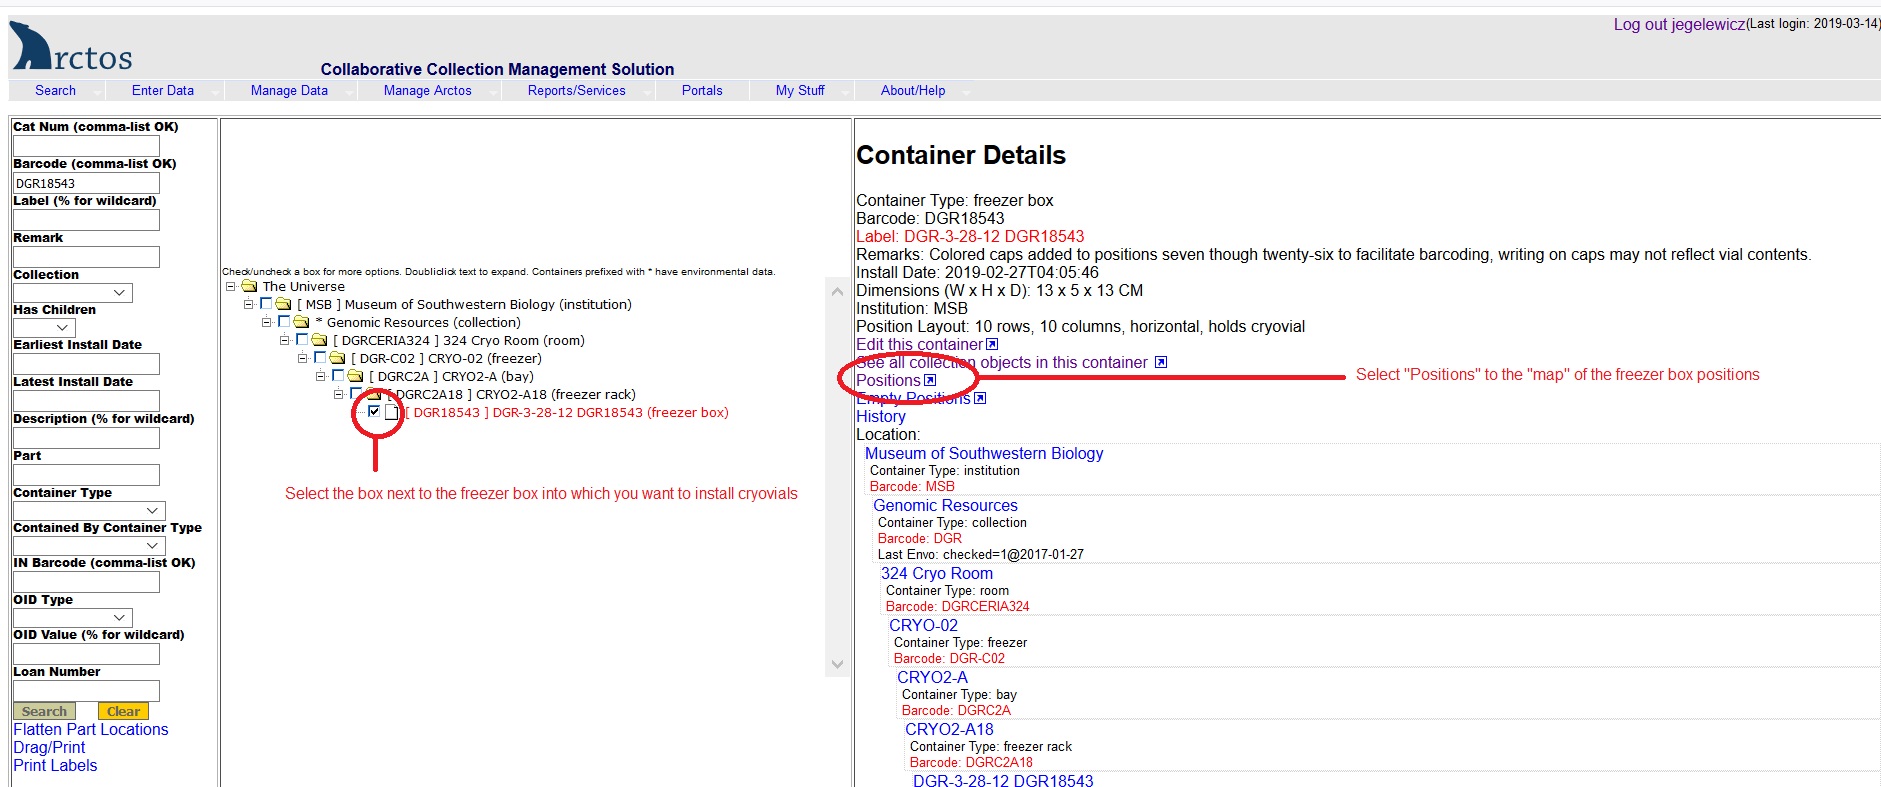
- From this list, select “Positions” and you will see a “map” of the freezer box with the positions in the format that was selected when positions were created for the box; if the positions were not created at the time the freezer box was created in Arctos, then you will be prompted to create them at this time (see How To Create an Individual Container in Arctos Object Tracking)
![]()
-
Place your cursor in the position where you want to install a cryovial and scan the barcode
-
Check that the correct barcode is scanned
-
Once scanned, the position will show both the scanned barcode and the associated label for the cryovial, which may or may not be the same as the barcode (e.g., the label may also be the collector’s initials and number as written on the vial)
-
If you have not programmed the scanner to tab after scan, you will need to select the next position for scanning either by selecting “Tab” on the computer keyboard or placing the cursor in the appropriate position
-
Repeat the scanning process until all the vials are scanned into position, a freezer box filled with cryovials will appear like this:
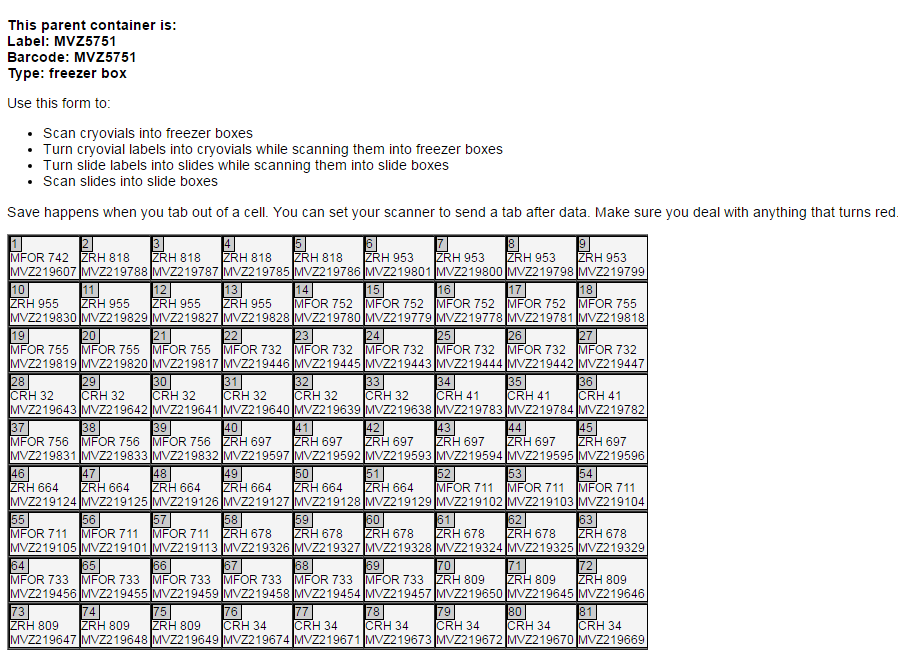
Congratulations! You have successfully installed cryovials into a freezer box!
Edit this Documentation
If you see something that needs to be edited in this document, you can create an issue using the link under the search widget at the top left side of this page, or you can edit directly here.